Sunday, May 2, 2010

How to Save the Land in Hero of Leaf Valley


******************************************************************************

Evidently, players are confused as to the different methods by which the land can be saved from development in 'Hero of Leaf Valley'.

As I have written in other posts, there are 16 different Story Quests that can be followed but these fall into three main categories.

The first category is the Main Story: Shoot for the Stars! The Greatest Farm in the World!

Many of the Events in this Story will be experienced automatically because they deal directly with the Funpark Corporation and the plan to develop the Land as a Funpark.
Alice, the CEO of the Company, will tell you that you can buy the land outright from the Corporation for 50,000G. Having the funds will not be sufficient to complete this Quest, however. You must defeat a number of Robot enemies created and let lose upon the land by the company...

There are two other ways to save the land from development, however, if you cannot manage the first or prefer one of the alternatives. As an alternative, you can transform the land into a Nature Preserve or into a Tourist destination.

Each one of the other Story Quests apart from the first is PART of one of the other two endings. You must complete THREE of the Nature Preserve Story Quests if you wish to save the land by cfreating a Nature Preserve. Or, you must complete THREE of the Tourist Destination Story Quests if you wish to transform the land into a desirable Tourist Attraction.

Players are confused by the Events that must be completed in this context. Each Story Quest has its own sequence of Events. Some Events in each Sequence are optional, which may be adding to the confusion. Others are mandatory. You must experience ALL THE MANDATORY EVENTS IN THREE OF THE STORY QUESTS either in the Nature Preserve category or in the Tourist Destination Category in order to save the land and be allowed to move forward to the third year.

If you choose one of the alternate methods, it is not a matter of experiencing a total number of Events from more than one Story Quest. It is a matter of completing three of the Stories successfully.


In other words, your options are to save the land by successfully completing:
Shoot for the Stars: The Greatest Farm in the World!

Or by completing THREE of the following Stories:

Tale of the Golden Potato Seed (Nature Preserve)
Tale of the Blue Mist and the Azure Swallowtails (Nature Preserve)
Tale of the Silver Fish (Nature Preserve)
Tale of the Blue Bird (Nature Preserve)
Tale of the Endangered Weasel (Nature Preserve)
The Hundred-Year-Old Cherry Tree (Nature Preserve)
The Secret Fossil (Nature Preserve)

Or by completing THREE of the following Stories:

Tale of the Harvest Goddess Dress (Tourist Destination)
Tale of the Cake Contest (Tourist Destination)
Tale of the Horse Race Champion (Tourist Destination)
The Harvest Goddess Temple (Tourist Destination)
Rebirth of the True Harvest Festival! (Tourist Destination)
The Holy Masterpiece (Tourist Destination)
The Legendary Baker (Tourist Destination)
Louis, the Inventor King (Tourist Destination)

You can complete Story Quests in another category if you wish but you cannot save the land by completing three Story Quests from DIFFERENT categories. In other words, completing 'The Holy Masterpiece' Quest, the 'Secret Fossil' Quest and 'The Tale of the Silver Fish' will NOT save Leaf Valley. You either have to complete two more Tourist Destination Quests or one more Nature Preserve Quest.

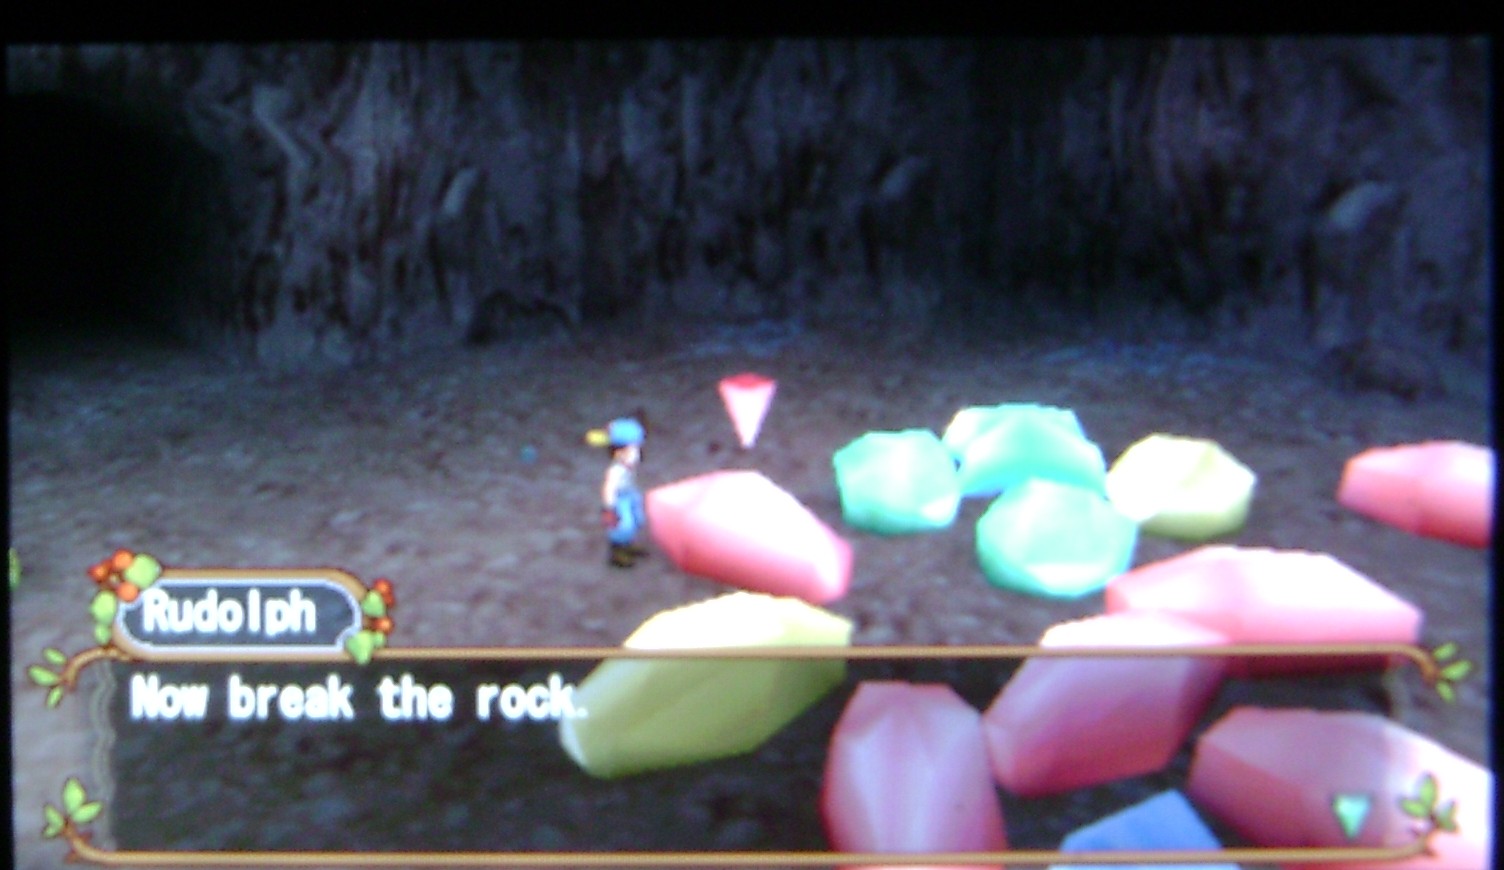
The screenshots are from three optional Events that begin three different Story Quests. The 'Tale of the Harvest Goddess Dress', 'Louis the Inventor King' and the 'Tale of the Endangered Weasel'.

Note that my 1st Year Events Calendar Guide, part of which is posted on this site, allows a player to co-ordinate his/her movements in order to begin as many of the Story Events as possible, giving his/her Character the option to choose the Quests he wishes to complete.

Tunnel vision always is a danger in any Harvest Moon or Rune Factory game. This is why my Calendar Events Guide is formatted according to date rather than Story.

Some Energy Recovery Values in Hero of Leaf Valley

In the early stages of any Harvest Moon game, restoring your Character's Energy Levels usually is a problem.

In Hero of Leaf Valley, your Character can do fairly well in terms of tilling his field, watering his Crops and caring for his Chickens even at the outset. Most of the Part-Time Jobs are not that taxing. The exception, however, is Woody's Part-Time Work in the Forest.

You will find that your Energy Bar can empty quickly when you are chopping down Trees for Woody or working for Rudolph in the Mine.

If you wish to be able to continue to operate during the remainder of the day, you will be forced to replenish your Stamina.

Incidentally, a reader shared a little tip: During the period before you unlock the Mine, you can restore your Energy Bar completely if you tell Rudolph that you do not know how to mine. It means that you will have to go through the entire Tutorial again, but if your Energy levels are low when you enter the Mine, it will restore them, allowing you to perform your task for him afterwards.

Here are basic values for some of the items you can obtain at the start of the game. SR stands for Stamina Recovery and FR for Fatigue Resistance. All of this information is included in my Hero of Leaf Valley General Guide/Walkthrough.

Items found in the Wilds:

Orange

Orange: 30G
Energy Value: +8 SR +0 FR
Found in Spring and Winter near the Café/Bar and Pike Mountain area

Grass

Grass: 0G
Energy Value: Nil
Found near Plaza and Pike Mountain

Cranberry

Cranberry: 30G
Energy Value: +6 SR -0 FR
Found in the areas of the Goddess Spring and Clove Villa

Chestnut

Chestnut: 20G
Energy Value: +6 SR -0 FR
Found in Summer and Autumn in the Plaza area; found in Winter near Woody’s Carpentry Shop

Walnut

Walnut: 20G
Energy Values: +8 SR -0 FR
Found in Summer and Autumn in the areas of Pike Mountain and Woody’s Carpentry Shop

Black Truffle

Black Truffle: 60G
Energy Value: +6 SR -0 FR
Found in Walnut Forest

Coral

Coral: 350G
Energy Value: Nil
Found on the beach near Crystal Bay

White Truffle

White Truffle: 60G
Energy Value: +6 SR -0 FR
Found in Walnut Forest area

Star Truffle

Star Truffle: 80G
Energy Value: +8 SR -0 FR
Found exclusively by your Dog

Wonderful Seashell

Wonderful Seashell: 40G
Energy Value: Nil
Found on the Beach at Crystal Bay.

Green Herb

Green Herb: 10G
Energy Value: +0 SR +8 FR
Found in all Seasons except Autumn near Ronald’s Grocery Shop, Pike Mountain and other areas

Clam

Clam: 30G
Energy Value: +10 SR +0 FR
Found only in Spring and Autumn on the Beach at Crystal Bay

Pink Cat Mint

Pink Cat Mint: 20G
Energy Value: Nil
Found in Summer and Autumn near Pike Mountain

Grapes

Grapes: 40G
Energy Value: +8 SR -0 FR
Found near Ronald’s Grocery and near Woody’s Carpentry Shop in Summer and solely near Ronald’s Grocery in Autumn

Blueberry

Blueberry: 20G
Energy Value: +6 SR -0 FR
Found in Spring and Summer near Ronald’s Grocery

Baby Truffle

Baby Truffle: 40G
Energy Value: +4 SR -0 FR
Found in Walnut Forest

Very Berry

Very Berry: 10G
Energy Value: +6 SR -0 FR
Found in Spring and Summer near the Plaza and the Café/Bar areas

Pontata Root

Pontata Root: 80G
Energy Value: +0 SR +20 FR
Found exclusively by your Dog when trained

Full Moon Berry

Full Moon Berry: 40G
Energy Value: +20 SR +0 FR
Found in Summer and Autumn near the Café/Bar

Moondrop Flower

Moondrop Flower: 10G
Energy Value: Nil
Found in Spring in the Clove Villa area and others (where clusters of flowers grow wild) and in Summer in the Pike Mountain area

Red Herb

Red Herb: 20G
Energy Value: +0 SR +10 FR
Found in all Seasons except Autumn near Florist/Item Shops and near the Plaza

Common Seashell

Common Seashell: 10G
Energy Value: Nil
Found on the Beach at Crystal Bay

Apple

Apple: 30G
Energy Value:
Found in all Seasons except Summer near the Goddess Spring and near Pike Mountain.

Note that one of the few items early in the game that will restore Fatigue is Red Herb.

Woody will give you a hint about this if you give him a Red Herb:

Woody for Red Herb: Oh, thanks. This is good for when you're tired.

As in many Harvest Moon games, you will find that the local Restaurants provide a fairly decent sources of Energy Recovery Items until you can afford to buy your own Kitchen.
In Hero, the two local Restaurants are to be found in a single location. The Café is open from noon to 5.00 p.m. and the Pub opens at 6.00 p.m. and stays open until Midnight.
Each has its own Menu but all items sold must be consumed immediately on the premises.
Daytime Menu at the Cafe:
Tea: 150G
This delicious tea will really relax you.
Herb Tea: 200G
It’s a soothing herbal tea. It will relieve a little weariness you might be feeling.
Energy Value: +0 SR +5 FR
Milk Tea: 200G
This milk tea full of fresh milk.
Cookie: 250G
A yummy, crunchy, homemade cookie.
Energy Value: +20 SR +0 FR
Muffin: 250G
This is a mildly sweet muffin. Comes with Very Berry Jam!
Energy Value: +20 SR +0 FR
Cake: 300G
It’s a sweet shortcake that uses pelnty of cream!
Energy Value: +32 SR +0 FR
Pancake: 300G
Hot and fluffy pancakes. Comes with sweet and yummy honey.
Energy Value: +30 SR +0 FR
Cheesecake: 350G
Every one loves cheesecake!
Energy Value: +36 SR +0 FR
Pub Menu:
Herb Wine: 350G
Energy Value: +0 SR +10 FR
Sauteed Mushrooms: 400G
Mushrooms sauteed in butter. Enjoy its simple flavours.
Energy Value: +20 SR +0 FR
Tomato Salad: 400G
Energy Value: +20 SR +0 FR
French Fries: 400G
Energy Value: +20 SR +0 FR
Assorted Cheese: 500G
Energy Value: +32 SR +0 FR
Fish Meal: 500G
Energy Value: +20 SR +0 FR
Traditionally, drinks that operate to restore Fatigue Resistance are sold at night and items rich in Stamina Recovery are sold during the Day. If you find yourself in a positionn where you need lots of Stamina Recovery after 6.00 p.m. when only the Pub is open, your best choice would be the Assorted Cheese which will give you +32 SR.


Energy Resources from Ronald

Items sold at Ronald’s Grocery have fairly good Energy Recovery Values and, unlike the items sold at the local Restaurants, you will be able to take them off the premises to use when needed.
Rice Ball: 120G
Energy Value: +12 SR + 0 FR
Fluffy Bread: 150G
Energy Value: +10 SR +0 FR
Miso: 200G
Energy Value: +20 SR +0 FR
Honey: 200G
Energy Value: +22 SR +0 FR
As you can see, the most effective Energy Recovery Item sold by Ronald is Honey, which restores more Stamina than most of the items sold at the local Restaurants as well as being less expensive.

Saturday, May 1, 2010

Calendar of all 1st Year Story Events in Hero of Leaf Village

The following is taken from my 'Hero of Leaf Valley 1st Year Calendar Events Guide'. At present, all 1st Year Events for about half of the Storylines have been added. I have made certain, however, to include ALL Events for every Storyline that occur in Spring. Where the first Event in any Storyline does not occur until later in the 1st Year, I have added that as well. I hope to have all first Year Events for all of the Story Quests entered in my 1st Year Events Calendar Guide by Monday.


Introduction


‘Hero of Leaf Valley’ has a primary Quest with a strict time limit that must be performed successfully. You must ‘save the land’ from the threat of development by the Funpark Corporation and you must do so by the end of the 2nd Year. Once you succeed in this primary Quest, the game no longer will make further demands upon your Character in terms of time or his activities. There are a multitude of Events that occur after the 2nd Year, but Leaf Valley will be safe from major threats.
There is more than one method by which you can end the threat of development and each has its own storyline. In fact, there are three major solutions to the threat, divided into 16 different specific methods. The most difficult method by which to save the land is to make 50,000G by the end of the 2nd year in order to be able to purchase the land outright from the Funpark Corporation. This is the first Story, entitled ‘Shoot for the Stars: The Greatest Farm in the World!’ It is not sufficient to have the necessary funds in order to succeed, however. You must be able to defeat the series of Robots that are sent into various locations at various times by the Funpark Corporation as well.

In fact, most of the main Events in the ‘Shoot for the Stars: The Greatest Farm in the World!’ will be experienced automatically by your Character, whether or not you have any intention of trying to earn sufficient income to buy the land from the Funpark Corporation. The threat of development of the land by the Funpark Corporation is the main Story of ‘Hero of Leaf Valley’ after all.

The other 15 Storylines fall into one of the two remaining solutions to the threat, which are to transform Leaf Valley either into a Nature Preserve or into a desirable Tourist Destination. In order to succeed in either of these aims, you must complete at least three of the Stories in that caregory. The List of all Storylines is as follows:

Shoot for the Stars: The Greatest Farm in the World!
Tale of the Golden Potato Seed (Nature Preserve)
Tale of the Blue Mist and the Azure Swallowtails (Nature Preserve)
Tale of the Silver Fish (Nature Preserve)
Tale of the Blue Bird (Nature Preserve)
Tale of the Endangered Weasel (Nature Preserve)
The Hundred-Year-Old Cherry Tree (Nature Preserve)
The Secret Fossil (Nature Preserve)
Tale of the Harvest Goddess Dress (Tourist Destination)
Tale of the Cake Contest (Tourist Destination)
Tale of the Horse Race Champion (Tourist Destination)
The Harvest Goddess Temple (Tourist Destination)
Rebirth of the True Harvest Festival! (Tourist Destination)
The Holy Masterpiece (Tourist Destination)
The Legendary Baker (Tourist Destination)
Louis, the Inventor King (Tourist Destination)

In other words, you must complete either three of the 'Tourist Destination' Story Quests or three of the 'Nature Preserve' Story Quests.

Each Storyline has its own Event sequences. Some Events are mandatory and others are optional to the successful completion of the specific Story.

The first Events in any Story Quest often simply 'set up' the Story iinn some fashion. In another Harvest Moon game, they might be termed 'Character Events' or 'Subsidiary Events'. In 'Hero of Leaf Valley', they usually involve the main Character in the Story Quest to which they have been linked but if you fail to experience an Optional Event, you still can pursue and complete the Story Quest, provided you meet all the Requirements for triggering the first MANDATORY Event in the Sequence.

This Events Calendar Guide adds a notation when any Event is Optional. You will see that many of the Events that occur in the first Spring ARE Optional Events. The Main Story Events dealing with Alice that occur in the first Spring are triggered automatically.


The reason I have organised my Events Calendar Guide to include ALL Events for ALL Quests is because some of the Events unlock special new options. For example, you can obtain a Horse from Bob in one of the optional Events connected with the 'Tale of the Horse Race Champion' Events. You can unlock Blue Mist Seeds at Lyla's Shop in one of the Events linked to the Blue Mist and Azure Swallowtail Story.

Some Events are fairly easy to experience if you go to the right location at the right time. Even if you do not wish to commit yourself to the Story Quest linked to the Event, it always is good to give yourself as many choices as possible.

I have created a Walkthrough/General Guide for Hero of Leaf Valley containing information about all general aspects of life, including Farming, Ranching, Mining, Fishing and Social Interactions. Although it contains some basic information about the various Storylines and contains a Calendar of Birthdays and Festivals, it does not give a Schedule of Events.
You will find my Hero of Leaf Valley General Guide at:
http://faqs.ign.com/articles/108/1086817p1.html

In ‘Friends of Mineral Town’, ‘More Friends of Mineral Town’, ‘HM DS’ and ‘HM Cute DS’, there were Events that could occur only in specific years. I therefore created special mini-guides in the form of Events Guides for each Year through the Fifth Year. In ‘Hero of Leaf Valley,’ Events in any of the 16 Storylines are set to occur only on specific dates in the first two years. I therefore have created similar Events Guides for the game. This is the Hero of Leaf Valley 1st Year Events Guide.
The Events Guide takes the form of a Calendar and Events are organised by Season and Date. The Calendar includes Events from all 16 of the Storylines. After the Title of the Event, the specific Storyline is given in brackets. As previously indicated, within any Storyline, some Events are mandatory but others are optional. When an Event is optional, this has been indicated. The time or times when the Event can be triggered, its location and any special Requirements are included as well. Where an Event can occur on more than one Day, it has been entered on the Calendar on the FIRST Day that it can be experienced. Where an Event has specific Weather Requirements, that information has been included.

Please note that any Event that is listed at the Homestead at 6.00 a.m. on any particular Day will occur when you first exit your Farmhouse. If you oversleep, the Event still should occur as soon as you leave the House. 6.00 a.m. therefore simply is the ‘default’ time for the Event.

You can experience Events for more than one of the Storylines in ‘Hero of Leaf Valley’. As the PSP offers multiple save slots, you can save your game at a point where you have not met ALL the requirements for one of the final Events in any Storyline. You then can move forward in new slots towards different endings.
In some cases, experiencing an Event will unlock new options, such as rare Seeds or new areas on the Map. You therefore may wish to experience as many Events as possible, even if you wish to pursue a specific ‘Ending’ in the 2nd Year. Where an Event has a ‘Result’ in terms of unlocking a new option, I have included that information.

A final note about Hero of Leaf Valley. Players who are familiar with ordinary Harvest Moon games have wondered why Heart Events are not given in the 1st Year Events Guide. Hero of Leaf Valley does not have the standard sequence of Heart Events that are included in most Harvest Moon games. Courtship of an Eligible Girl can begin in the first two years of the game, but you will not be able to marry until you have saved the land. Friendship Levels determine many of the Events that will allow you to complete a Story Quest. Those same Friendship Levels can be used later to further your Courtship of a specific Girl.

In HoLV, however, there is a special Courtship Event that may occur after you succeed in your Quest of saving the land. It is a 'Confession' by the Eligible Girl who has the highest FP at that point. As in Another Wonderful Life, you are not given any choice beyond that of choosing to raise Friendship Levels for one Girl higher than the others. Unlike AWL, however, experiencing a Girl's Confession will not obligate you to marry THAT Girl... Once Leaf Valley is saved from the threat of development, you can move forward, courting any Girl you like.


Friendship Level Requirements

When you study the Calendar of Events, you will see that one of the most common Requirements is a specific Friendship Level with one or more Characters.
At the very start of the game, the Harvest Goddess will ask three questions. The responses you choose will boost the friendship of a selected group of Characters in Leaf Valley.

If you give the 'positive' response or first response to each of the three questions of the Harvest Goddess, you will earn +15 FP with the following individuals: the Harvest Goddess herself, Dia, Louis, Bob, Joe, Wallace, Chester and Nak.

If you give the 'negative' or second response to each of her three questions, you will gain +15 FP with Katie, Gina, Kurt, Ronald, Charlie, Renton, Rudolph and Nik.

If you give a combination of positive and negative responses, you earn +15 FP with Gwen, Lyla, Aurelia, Alice, Parsley, Tim, Woody, Martha and Flak.

When a minimum Friendship Level is a Requirement for any Event that occurs in the first Spring and you are determined to experience that Event, you may wish to tailor your Responses to the questions posed by the Harvest Goddess to boost the FP of the Character involved in the Event.

Once you have been introduced to any Character, you can earn Friendship Points with the following actions, among others:

‘Meet and Greet’ an individual to gain +1 FP with him/her
Give an individual an Item he/she likes or loves to gain +1 - +3 FP. If the item is a Most Favourite Gift, it will result in an increase of +3 FP. IF the item simply is acceptable to the Character, you will gain +1 FP. Items that the Character loves but are not ‘Most Favourites’ are worth +2 FP.

Remembering a Character on his/her Birthday with a Most Favourite Gift will result in a gain of +10 FP.

Working Part-Time for local merchants and buying items from their Shops will earn Friendship Points with those Characters. Completing Requests will endear you to the Individuals who make them as well.

The biggest problem in any Harvest Moon game, especially at the beginning, is not lack of money but lack of time. ‘Meeting and Greeting’ every Character on the Map can be extremely time-consuming.

Leaf Valley is not a small Valley. As Renton remarks:
Renton: It takes about half a day to circle around the whole town. It’s a little too big...

I have written about the 'Easy Gifts' for each Character in another post.

Calendar of 1st Year Events


Calendar of 1st Year Events


Spring

1 Spring: Renton’s Birthday
N.B. You will not meet Renton for the first time until 3 Spring
6.00 a.m. Introduction Event for Nic, Nak, Flak and Harvest Goddess (Automatic)
Location: Homestead
2 Spring – 21 Spring or 23 Spring – 30 Spring:
8.00 a.m. – 4.59 p.m.: Let’s Take Care of Animals! (Tale of the Horse Race Champion)
Location: Bob’s Animal Supply Shop
Requirements: Accept Part-Time Work at the Starling Ranch; only when the weather is fine and not on Thursdays
Results: If you respond ‘Yes’ after completing your Work, you will gain +10 FP with Bob. You will need Bob at 30 FP or more and the Livestock at Starling Ranch at a total of 40 FP or more by 2 Summer – 6 Summer in order to receive a Horse from him.
3 Spring:
6.00 a.m. Introduction Event for Alice, Renton and Charles (Automatic)
Location: Homestead
5 Spring: Alice’s Birthday
8 Spring:
6.00 a.m.: Introduction Event for Aurelia and Chester (Automatic)
Location: Homestead
9 Spring or 11, 16, 18, 25 Spring:
8.00 a.m. – 5.59 p.m.: Invitation to Fish (Tale of the Silver Fish) (Optional)
Location: Mallard Lake area
Requirement: Joe must have 5FP or higher; Will not occur in foul weather
N.B. Even if you have a Fishing Rod, you can tell him you do not have one in order to experience the Event.
11 Spring: Harvest Goddess Festival; Ronald’s Birthday
An accepted Gift to a Character on this date is worth more than the same Gift given on any ordinary Day
12 Spring, 14 Spring – 16 Spring or 18 Spring:
10.00 a.m. – 5.59 p.m.: The Tool Shop Owner is an Inventor (Louis, the Inventor King) (Optional)
Location: Enter Louis’ Item Shop
Requirements: Louis must be at 20 FP or higher
12 Spring – 16 Spring:
6.00 a.m.: Farm Inspection Event (Tale of the Endangered Weasel) (Optional)
Location: Homestead
Requirements: Gwen must have at least 5FP and you must have at least 1FP with an Animal apart from your Dog; Event will not occur in foul weather
N.B. Give both positive and negative responses to the three Quiz questions of the Harvest Goddess at the start of the game to gain +15 FP with Gwen
12 Spring – 13 Spring or 15 Spring – 17 Spring:
8.00 a.m. – 5.59 p.m.: Gina’s New Friend (Tale of the Harvest Goddess Dress) (Optional)
Location: Enter Ronald’s Grocery Store
Requirements: Gina must have 20 FP or higher and you must have met Katie previously.
N.B. By giving the negative or ‘second’ Responses to all three Questions posed by the Harvest Goddess, you can earn +15 FP with Gina at the start of the game.
16 Spring: Parsley’s Birthday
18 Spring – 21 Spring, 24 Spring:
6.00 a.m.: Lyla and Parsley’s Request (Tale of the Blue Mist and the Azure Swallowtails)
Location: Homestead
Other Requirements: Lyla must have 20 FP or higher, you must have met Parsley previously and have sold at least 4 Crops
N.B. The last possible opportunity to experience this Event to begin this Story is on 24 Spring. Give BOTH positive and negative Responses in the H. Goddess Quiz to gain 15 FP with Lyla on the first day of the game.
22 Spring – 26 Spring:
6.00 a.m. – 5.59 p.m.: The Goddess’ Love Conference: ‘I’ll Follow You’ (The Harvest Goddess Temple) (Optional)
Location: Enter the Goddess Spring area
Requirements: Harvest Goddess must have 20 FP or higher; Event will not occur in foul Weather
23 Spring:
6.00 a.m. Alice’s Position Event (Shoot for the Stars)
Location: Homestead
23 Spring – 26 Spring:
8.00 a.m. – 5.59 p.m.: Ronald’s Concern (The Legendary Baker) (Optional)
Location: Enter Ronald’s Grocery Store
Requirements: Ronald must be at 20 FP or higher; will not occur in foul weather
26 Spring – 28 Spring, 30 Spring or 2 Summer:
6.00 a.m. Katie’s Invitation (Tale of the Cake Contest) (Optional)
Location: Homestead
You must have met Wallace previously; Katie must have 20 FP or higher*
N.B. To gain +15 FP with Katie at the very start of the game, give negative responses to all three Questions posed by the Harvest Goddess
27 Spring: Lyla’s Birthday

Summer

1 Summer: Earth Day; Bob’s Birthday
2 Summer – 6 Summer:
6.00 a.m.: Where the Blue Flowers Bloom (Tale of the Blue Mist and Azure Swallowtails)
Location: Homestead
Other Requirements: You must have experienced ‘Lyla and Parsley’s Request’ Event, have sold at least 8 Crops and have Lyla at 31 FP or higher; Event will not occur in foul weather
Results: This Event unlocks Blue Mist Seeds at Lyla’s Florist Shop
6.00 a.m. : Raise a Horse! (Tale of the Horse Race Champion) (Optional)
Location: Homestead
Requirements: Bob must have at least 30 FP, your Total Friendship Level with the Animals at Starling Ranch must be at least 40 FP and you cannot have purchased a Horse prior to this; Event will occur only if the weather is fine
Result: Bob will lend you the money to purchase a Horse! You will be given the Horse that has the highest Friendship Level, by the way. If you have a preference, favour that horse when you perform part-time labour for Bob.
N.B. You can gain +15 FP with Bob at the start of the game if you give the positive or ‘first’ answer to all three Questions posed by the Harvest Goddess
4 Summer – 8 Summer:
8.00 a.m. – 9.59 p.m. : The Lady of the Mansion Event (Tale of the Golden Potato Seed) (Optional)
Location: Enter Clove Villa
Other Requirements: Dia must have 36 FP or higher, you must have met Martha and Gina previously and Dia must be inside the Villa
N.B. Give only positive responses in the Harvest Goddess Quiz to gain 15 FP with Dia on the first day of the game.
8 Summer: Gwen’s Birthday
6.00 a.m. A Signboard for the Town Event (Shoot for the Stars)
Location: Homestead
9 Summer – 12 Summer, 14 Summer:
12.00 noon – 4.59 p.m. or 6.00 p.m. – 11.59 p.m.:: The Azure Swallowtail Nature Memorial Event (Tale of the Blue Mist and Azure Swallowtails)
Location: Enter Sunny Garden Café/Moon Garden Pub
Other Requirements: You must have experienced Where the Blue Flowers Bloom Event, must have sold at least 12 Crops (excluding Mist Bloom) and have met Woody and Wallace previously
9 Summer – 13 Summer:
6.00 a.m.: Taking Care of Endangered Animals (Tale of the Endangered Weasel)
Location: Homestead
Requirements: Gwen must be at 10 FP or higher and you must have at least 20 FP with an Animal other than your Dog; Event will not occur in foul weather.
6.00 a.m. Secret Tip: The Legendary Painting (The 100 Year Old Cherry Tree, Tim’s Path*) (Optional)
Location Homestead
Requirements: Tim must have at least 20 FP; Event will not occur in foul weather
*The 100 Year Old Cherry Tree has two separate paths in terms of Events. Tim is the protagonist in one path, while Parsley is the central character in the other. You only can experience ONE Path of Events in this Story after you experience the first mandatory Event, which is ‘Searching for the One Hundred Year Old Cherry Tree’).
6.00 a.m.: Create an Outfit for the Goddess (Tale of the Harvest Goddess Dress)
Location: Homestead
Requirements: Gina has at least 25 FP; Event will not occur in foul weather
N.B. This is the first Mandatory Event for the Tale of the Harvest Goddess Dress
10 Summer: Joe’s Birthday
11 Summer – 30 Summer:
6.00 a.m. – 5.59 p.m.: The Withered Blue Mist Event (Tale of the Blue Mist and Azure Swallowtails)
Location: Enter the Goddess Spring area
Other Requirements: You must have experienced previous Event in sequence, Blue Mist Flowers must be ready to harvest; this Event will not occur in foul Weather
14 Summer: Rudolph’s Birthday
14 Summer – 18 Summer:
6.00 a.m.: Talk to the Holy Father (Tale of the Harvest Goddess Dress) (Optional)
Location: Homestead
Requirements: Gina has at least 30 FP and you must have experienced the ‘Create an Outfit for the Harvest Goddess’ Event
15 Summer: Zann’s Birthday
N.B. You will not meet Zann in the 1st Year
15 Summer – 19 Summer:
6.00 p.m. – 11.59 p.m.: Rudolph’s Drunken Tale: The Diamond’s Vein (The Secret Fossil) (Optional)
Location: Enter the Moon Garden Pub
Requirements: You must have at least 20 FP with Rudolph.
N.B. Choose all negative responses in the Quiz of the Harvest Goddess to gain +15 FP with Rudolph at the start of the game.
16 Summer – 19 Summer or 21 Summer:
6.00 a.m. to 5.59 p.m. The Sound of the Flute at Mallard Lake Event (Tale of the Blue Bird)
Location: Enter Sunny Garden Café/Moon Garden Pub area
Requirements: Aurelia must have at least 20 FP, you must have met Wallace previously; Event will not occur in foul weather*
*You will need to purchase the Ocarina from Louis’ Item Shop in order to complete the sequence of Events in this Tale. The Ocarina is a necessity if you wish to train your Dog to ‘search’ for items, including Power Berries.
N.B. Give both positive and negative Responses in the Harvest Goddess Quiz to gain 15 FP with Aurelia on the 1st day of the game.
16 Summer – 20 Summer:
6.00 a.m. – 5.59 p.m.: Martha’s Memory (Rebirth of the Harvest Goddess Festival) (Optional)
Location: Enter Crystal Bay area
Requirements: Martha must be at 10 FP or higher; Weather must be fine
18 Summer – 22 Summer
8.00 a.m. – 9.59 p.m.: Affection from a Present Event (Golden Potato Seed) (Optional)
Location: Enter Clove Villa
Other Requirements: Dia must have 46 FP or higher and must be inside Clove Villa
19 Summer – 23 Summer:
6.00 a.m. – 5.59 p.m.: Katie Participates in the Design! (Tale of the Harvest Goddess Dress)
Location: Enter the Clove Villa Area
Requirements: You must have met Katie previously; Gina must have at least 40 FP and you must have experienced the ‘Create an Outfit for the Harvest Goddess’ Event; this Event will not occur in foul weather
19 Summer – 28 Summer:
6.00 a.m. – 5.59 p.m.: The Goddess’ Happiness (Tale of the Harvest Goddess Dress)
Location: Enter the Goddess Spring area
Requirements: You must have experienced the ‘Katie Participates in the Design!’ Event; this Event requires fine weather
19 Summer – 26 Summer, 28 Summer or 3 Autumn:
10.00 a.m. – 5.59 p.m.: The Sewing Technique (Tale of the Harvest Goddess Dress)
Location: Enter Louis’ Item Shop
Requirements: You must have met Louis previously; you must have experienced ‘The Goddess’ Happiness’ Event; Event will not occur on Wednesday or Saturday
20 Summer: Fireworks Day
21 Summer: Wallace’s Birthday
24 Summer: Chester’s Birthday
26 Summer or 28 Summer or 1 Autumn:
12.00 p.m. – 4.59 p.m.: The Legendary Flute Sound Event (Tale of the Bluebird)
Location: Enter Sunny Garden Café
Requirements: You must have experienced the ‘Sound of the Flute at Mallard Lake’ Event; Aurelia must be at 30 FP or higher; you must have met both Katie and Wallace previously; Event will not occur in foul weather
6.00 a.m.: The Sacred Land (The 100 Year Old Cherry Tree, Tim’s Path) (Optional)
Location: Homestead
Requirements: Tim must have at least 30 FP; Event will not occur in foul weather
27 Summer: Race Day
29 Summer – 3 Autumn:
6.00 p.m. – 11.59 p.m.: Rudolph’s Drunken Tale: To the Next Country (The Secret Fossil) (Optional)
Location: Enter the Moon Garden Pub
Requirements: Rudolph has at least 25 FP

Autumn/Fall

1 Autumn – 5 Autumn:
6.00 a.m. – 5.59 p.m.: The Painting in the Church Basement (The Holy Masterpiece)
Location: Enter the Mallard Lake area
Requirements: You must have obtained at least 20 items from the Mine; Event will occur only if the Weather is fine
N.B. This is the first Mandatory Event and indeed, the first Event in The Holy Masterpiece Story
2 Autumn - 6 Autumn:
6.00 a.m. What is Written on the Treasure Map? Event (Tale of the Golden Potato Seed)
Location: Homestead
Requirements: Dia has 61 FP or higher and you have met Tim previously
6.00 a.m. A Brief Parting (The 100 Year Old Cherry Tree, Parsley’s Path*) (Optional)
Location: Homestead
Requirements: Parsley must have at least +30 FP
*The 100 Year Old Cherry Tree has two separate paths in terms of Events. Tim is the protagonist in one path, while Parsley is the central character in the other. You only can experience ONE Path of Events in this Story after you experience the first mandatory Event, which is ‘Searching for the One Hundred Year Old Cherry Tree’.
6.00 a.m. The Running Shadow (Tale of the Endangered Weasel)
Location: Homestead
Requirements: You must have experienced the Taking Care of Endangered Animals Event, Gwen must be at 15 FP or higher, you must have at least 50 FP with an Animal other than your Dog; Event will not occur in foul weather.
2 Autumn: Louis’ Birthday
4 Autumn – 12 Autumn:
6.00 a.m. – 5.59 p.m.: Dia’s Jealousy (Tale of the Harvest Goddess Dress)
Location: Enter the Clove Villa area
Requirements: You must have met Joe previously; Gina must be at 70 FP or higher; you must have experienced ‘The Sewing Technique’ Event; this Event will not occur in foul weather
4 Autumn – 13 Autumn:
6.00 a.m. – 5.59 p.m.: Giving the Thread to the Goddess (Tale of the Harvest Goddess Dress)
Location; Enter the Goddess Spring area
Requirements: You must have experienced ‘Dia’s Jealousy’ and must be carrying the Silk Thread; weather must be fine
5 Autumn: Aurelia’s Birthday
7 Autumn – 11 Autumn:
6.00 a.m. – 5.59 p.m. Lyla’s Anxiety Event (Blue Mist and Azure Swallowtails)(Optional)
Location: Enter the Goddess Spring area
Other Requirements: You must have experienced ‘The Withered Blue Mist’ Event and Lyla must have 50 FP or higher; this Event will not occur in foul Weather.
6.00 a.m. – 5.59 p.m. The Ocarina Challenge Event (Tale of the Blue Bird)
Location: Enter the Mallard Lake area
Other Requirements: You must have experienced ‘The Legendary Flute Sound’ Event; Aurelia must be at least 40FP; you must have your own Ocarina; Event will not occur in foul weather
8 Autumn – 11 Autumn, 13 Autumn or 15-16 Autumn
6.00 a.m. – 5.59 p.m.: The Mysterious Blue Bird
Location: Enter Woody’s Carpentry area
Other Requirements: You must have experienced ‘The Ocarina Challenge’ Event and you must have met Gwen previously; Event will not occur in foul weather.
11 Autumn – 15 Autumn:
8.00 a.m. – 5.59 p.m.: The Road to the Sacred Land Event (Golden Potato Seed) (Optional)
Location: Enter Woody’s Carpentry area
Other Requirements: Will not occur in foul Weather; you must have met Woody prior to this and Woody must be in the area
12 Autumn: Tim’s Birthday
13 Autumn – 17 Autumn:
6.00 p.m. – 11.59 p.m.: The Kindness of the People of Leaf Valley (The Secret Fossil) (Optional)
Location: Enter the Moon Garden Pub
Requirements: Rudolph is at 30 FP or higher
16 Autumn – 20 Autumn:
6.00 a.m.: Secret Tip: Fossil in the Mine (The 100 Year Old Cherry Tree, Tim’s Path) (Optional)
Location: Homestead
Requirements: Time must have at least 40 FP; Event will not occur in foul weather
6.00 a.m.: Seven-Colour Cloth Complete! (Tale of the Harvest Goddess Dress)
Location: Homestead
Requirements: You must have experienced ‘Giving the Thread to the Goddess’ Event and Gina must have at least 80 FP; weather must be fine
16 Autumn – 24 Autumn:
8.00 a.m. – 9.59 p.m.: Taking the Seven-Colour Cloth to Gina (Tale of the Harvest Goddess Dress)
Location: Enter Clove Villa
Requirements: You must have experienced the ‘Seven-Colour Cloth Complete!’ Event and you must be carrying the Seven-Colour Cloth; Gina must be inside the Villa
20 Autumn: Gina’s Birthday
20 Autumn – 24 Autumn:
6.00 a.m. : Check the Old Scroll at the Church! Event (Golden Potato Seed) (Optional)
Requirements: You must have experienced the ‘What is Written on the Treasure Map’ Event and Dia’s FP must be 71 or higher
25 Autumn: Race Day
26 Autumn – 27 Autumn, 29 Autumn or 1 Winter:
6.00 a.m.: Welcome Home to Leaf Valley (The 100 Year Old Cherry Tree, Parsley’s Path) (Optional)
Location: Homestead
Requirements: You must have experienced ‘A Brief Parting’ previously
Result: +10 FP increase for Parsley when you discuss his journey
26 Autumn or 28 Autumn, 3 Winter, 5 Winter or 10 Winter:
10.00 a.m. – 5.59 p.m. Parental Distress (Silver Fish) (Optional)
Location: Enter Mallard Lake Area
Requirements: Joe or Kurt must have at least 30 FP and you must have met Woody previously; Event will not occur in foul weather
28 Autumn:
6.00 a.m. An Alarming Atmosphere Event (Shoot for the Stars)
Location: Homestead
29 Autumn: Katie’s Birthday

Winter

2 Winter: Woody’s Birthday
6.00 a.m. The Mysterious Crop-Ruining Bird Event (Shoot for the Stars)
Location: Homestead
6.01 a.m. – 5.59 p.m. Drive Back the Robot Crow! (Shoot for the Stars) (Optional)
Location: Enter area of Lyla’s Florist/Louis’ Item Shops
N.B. If you defeat the Crow, +10 FP increase for Alice
3 Winter – 7 Winter:
6.00 a.m.: Discovery of the Sacred Land (Tale of the Golden Potato Seed)
Location: Homestead
Requirements: Will not occur in foul Weather; you must have experienced the ‘What is Written on the Treasure Map? Event, you must have sold at least 16 Crops (excluding Mist Bloom) and Dia’s FP must be 81 or higher
12.00 p.m. to 4.59 p.m.: Legend of the Blue Bird Event (Tale of the Blue Bird)
Location: Enter the Sunny Garden Café
Other Requirements: You must have experienced ‘The Mysterious Blue Bird’ Event; Aurelia must have 50 FP or higher
3 Winter – 8 Winter:
6.00 a.m.: The Mysterious Shadow’s Identity (Tale of the Endangered Weasel)
Location: Homestead
Requirements: Gwen must have 30 FP or higher; Event will not occur in foul weather
4 Winter – 29 Winter
8.00 a.m. – 5.59 p.m.: Mysterious Seeds in the Sacred Land (Tale of the Golden Potato Seed)
Location: Enter the Sacred Land area
Other Requirements: You must have experienced the ‘Discovery of the Sacred Land’ Event (obviously!), have sold 20 or more Crops (excluding Mist Bloom) and have 9 Crops ready for Harvest in 9 squares in the Sacred Land Plot.
5 Winter – 29 Winter
11.00 a.m. – 5.59 p.m. : Dia Perseveres Event (Golden Potato Seed) (Optional)
Location: Enter the Sacred Land area
Other Requirements: You must have experienced the ‘Mysterious Seeds in the Sacred Land’ Event, Dia must have 86 FP or higher and she must be in the Sacred Land area
N.B. Note that this Event must occur within three days of the ‘Mysterious Seeds’ Event, but if you experience the ‘Mysterious Seed’ Event on the 28th or 29th, you can experience this Event on 1 Spring or 2 Spring of the 2nd Year.
6 Winter:
6.00 a.m. Louis’ Achievement Event (Shoot for the Stars) (Optional)
Location: Homestead
Requirements: This Event only occurs if you fail to experience ‘Drive Back the Robot Crow!’ or if you fail to defeat the Robot Crow
6 Winter – 10 Winter:
6.00 a.m.: Searching for the Hundred Year Old Cherry Tree (The Hundred Year Old Cherry Tree, Parsley’s Path)
Location: Homestead
Requirements: Parsley must be at 50 FP or higher and Tim must have a lower FP than Parsley; you cannot have experienced ‘Secret Tip: The Hundred Year Old Cherry Tree, Tim’s Path); this Event will not occur in foul weather.
N.B. This is the first Mandatory Event in Parsley’s Path in this Story.
6.00 a.m.: Secret Tip: The Hundred Year Old Cherry Tree (The Hundred Year Old Cherry Tree, Tim’s Path)
Location: Homestead
Requirements: Tim must be at 50 HP or higher and Parsley must have a lower FP than Tim. You must have not have experienced the ‘Searching for the Hundred Year Old Cherry Tree’ Event; this Event will not occur in foul weather
N.B. This is the first Mandatory Event in Tim’s Path in this Story
6 Winter – 9 Winter, 11 Winter, 13 – 16 Winter or 18 Winter
6.00 a.m. – 5.59 p.m.: Gather Lumber! (The Hundred Year Old Cherry Tree)
Location: Enter Woody’s Carpentry area
Requirements: You must have met Woody previously and have experienced either Tim’s Event of ‘Secret Tip: Hundred Year Old Cherry Tree’ or Parsley’s Event, ‘Searching for the Hundred Year Old Cherry Tree; will not occur in foul weather
N.B. This Mandatory Event will occur on BOTH Tim’s and Parsley’s Paths
7 Winter – 20 Winter:
6.00 a.m. – 5.59 p.m.: The Hundred Year Old Cherry Tree: The Investigation Begins
Location: Enter the Sunny Garden Café area
Requirements: You must have experienced the ‘Gather Lumber!’ Event at least one day prior to this
N.B. This Mandatory Event occurs both on Parsley’s and Tim’s Paths
8 Winter – 29 Winter: The Sprouts Appear! Event (Golden Potato Seed) (Optional)
Location: Enter the Sacred Land area
Other Requirements: You must have experienced ‘Mysterious Seeds’ Event and ‘Dia Perseveres’ Event, Dia must have 91FP or higher and must be in the Sacred Land area
N.B. If you experience the ‘Mysterious Seed’ Event and ‘Dia Perseveres’ Event late in Winter, although this Event must occur within four days of the previous Event, it can occur from 1 Spring - 7 Spring of the 2nd Year.
9 Winter: Dia’s Birthday
10 Winter: Kurt’s Birthday
11 Winter – 13 Winter: The Fruit of Fortune (Tale of the Golden Potato Seed)
Location: Homestead
Other Requirements: You must have experienced ‘The Mysterious Seeds’ Event, sold more than 29 Crops (excluding Mist Bloom), have met both Woody and Parsley previously and have Dia at 95 FP or higher.
N.B. If you experienced the prior Events in this Sequence near the end of Winter, this Event can occur in the 2nd Year between 1 Spring – 4 Spring (5 days after the previous Event) or between 6 Spring – 10 Spring (7 days after the previous Event) at the latest.
THESE ARE THE LAST REQUIREMENTS FOR THE SUCCESSFUL COMPLETION OF THE TALE OF THE GOLDEN POTATO SEEDS.
Note that a final mandatory Event will occur between 2 Summer – 6 Summer in the 2nd Year when you leave your Farmhouse but by experiencing the ‘Fruit of Fortune’ Event, you have succeeded in the Quest to save the Land.
14 Winter:
6.00 a.m. Sold to the Mine Event
Results: Part-Time Work no longer available at the Dig Site until 24 Winter
15 Winter – 19 Winter:
6.00 a.m.: Where the Fossil is Hidden (The Secret Fossil)
Location: Homestead
Requirements: You have obtained at least 25 items from the Mine, excluding Mineral Crystals
N.B. This is the first Mandatory Event in ‘The Secret Fossil’ Story
20 Winter:
6.00 a.m. The Mechanical Mole in the Mine Event (Shoot for the Stars)
Location: Homestead
6.01 a.m. – 5.59 p.m. Drive Back the Mechanical Mole Event (Shoot for the Stars) (Optional)
Location: Enter the Dig Site
Results: If you defeat the Mechanical Mole, +10 FP to Alice, you unlock the Mechanical Mole area of the Dig Site and Part-Time Work at the Dig Site will become available again on 24 Winter.
21 Winter:
6.00 a.m. Rudolph’s Protest Event (Shoot for the Stars) (Optional)
Location: Homestead
Requirements: This Event will occur only if you failed to experience the Drive Back the Mechanical Mole Event at the Mine or if you failed to defeat it.
21 Winter – 25 Winter:
6.00 a.m. – 5.59 p.m.: Save Rudolph! (The Secret Fossil)
Location: Dig Site of the Mine
Requirements: You must have experienced the ‘Where the Fossil is Hidden’ Event and Rudolph must have at least 40 FP
22 Winter or 24-27 Winter:
6.00 a.m.: To Save the Village… (Tale of the Silver Fish)
Location: Homestead
Requirements: You must have caught at least one Fish; Event will not occur in foul weather
23 Winter: Liar’s Day; Charles’ Birthday
24 Winter – 28 Winter:
6.00 a.m. – 5.59 p.m.: I Hate Winter! Event (Blue Mist and Azure Swallowtails) (Optional)
Location: Enter area of Lyla’s Florist/Louis’ Item Shops
Other Requirements: You must have experienced ‘The Withered Blue Mist’ Event, have met Louis previously and Lyla must have 60 FP or higher; Event will not occur in foul weather
25 Winter: Martha’s Birthday
25 Winter – 29 Winter:
6.00 a.m. Unveiling of the Goddess’ Clothes (Tale of the Harvest Goddess Dress)
Location: Homestead
Requirements: you must have experienced the ‘Taking the Seven-Colour Cloth to Gina’ Event and Gina must have at least 100 FP.
30 Winter: New Year’s Day Festival

Friday, April 30, 2010

Fishing in Hero of Leaf Valley


*************************************************************************

'Save the Homeland' was a wonderful game, but I have to say that 'Hero of Leaf Valley' surpasses it in every way, at least in my view. Any aspect of 'Save the Homeland' that frustrated me somewhat has been changed and improved in HoLV.

Fishing is one aspect of the game that is immeasurably more fun and satisfying in HoLV. I was prepared to face a rather frustrating long initial phase of catching nothing, followed by a long procession of boots and empty bottles. Much to my delight, this was not my experience at all. There was a day or so when my Character had to go home without any fish, but after that, he at least was able to catch more than one Fish on any fishing expedition.

The actual Fishing mini-game is fun. Even more satisfying is the Character of Ponta and the 'Fish Prints' he creates. They are works of art, quite exquisite, a vast improvement upon the rather insipid King Fish prints that would be your only souvenir of catching some of the rare fish in older HM games.

Incidentally, the rule in HoLV that allows you to offer only one item per day to any Character as a Gift does not apply to 'collectors' such as Ponta (who collects fish) and Tim (who collects insects). You therefore can continue to give Fish to Ponta in the course of a single encounter until you have obtained everything you wish.

Hero of Leaf Valley 1st Year Events Guide

I am creating 1st and 2nd Year Event Calendar Guides for Hero of Leaf Valley in the style of my Event Calendar Guides for FoMT/MFoMT, HM DS and Cute DS. They will contain the schedules of ALL Events (both mandatory and optional) for all 16 Storylines. I have completed the schedules for the 1st Year for the first three Storylines and the Guide is live on IGN. By the end of the weekend, I hope to have both first and second Year Events for all the Stories.

You will find the link to the 1st Year Events Calendar Guide as well as my other HoLV Guides on the right side of the page.

Thursday, April 29, 2010

Mining is a BLAST in Hero of Leaf Valley


******************************************************************************
My Character had his first opportunity to apply for part-time work with Rudolph in the Mine. In 'Hero of Leaf Island', the opportunity for part-time work gives you an added source of much-needed income early in the game. It is a rather clever mechanism for affording the player a tutorial about a specific aspect of life in Leaf Valley while paying him to learn about it. Detailed tutorials about every activity exist in every Harvest Moon game, but half the time, players are too impatient to take advantage of them. Either dismissed as tedious or unnecessary, many players prefer to flounder in unfathomed waters rather than READ a manual or go through every step of a farming tutorial.

In 'Hero of Leaf Valley', you can sign up for a tutorial about Mining under Rudolph's tutelage and go home at the end with 450G and a rucksack filled with Ores.

Mining consists of a mini-game puzzle where rocks of different colours have different properties and each has its own direction of explosion when hit with your Hammer. Yellow Rocks cannot be smashed with a Hammer, but can be moved to a position where the direction of an explosion when you hit another rock will cause the Yellow Rock to fly into bits. It is very entertaining.

Raising Friendship Levels in Hero of Leaf Village

'Hero of Leaf Village' follows basic Harvest Moon rules where Friendship is concerned. Your Friendship Levels with specific Characters will determine your success or failure in any specific quest to save the Land. Beyond that, marriage is a possibility once you have saved the Land from destruction and therefore, your Friendship Levels with the Eligible Girl of your choice will determine your prospects for marriage.

In 'Hero of Leaf Valley', 'meeting and greeting' any Character on a given day will raise Friendship by +1 FP. A gift of a 'Most Favourite Item' is worth +3 FP. A simple Favourite is worth +2 FP and an acceptable Gift is worth +1 FP. Unlike many other Harvest Moon games, unacceptable or disliked items simply will be refused. You therefore cannot 'waste' an item by giving it to some one who will not appreciate it.

You are allowed to give one Gift per day to any Character. There is one added twist to this in that an item that has been refused counts as the gift for the day even though it was not accepted. You therefore can waste your opportunity to give a desired Gift, although you cannot waste an actual item.

Gift-giving is fairly easy in Hero. There are a number of inexpensive items that can be found in the Wilds that are acceptable to almost every Character in the game. These include Fruits and Berries, Red Herb, Flowers and any size of Fish. Crops and Eggs are acceptable as well to most Characters. There are only a few exceptions. Chester does not care for Crops, while Joe does not like Red Herb. Ponta likes ONLY Fish.

Although most Characters will not appreciate the Gift of Fodder, there are a number who do. Bob, Chester, Joe, Parsley, Ronald and Rudolph all will accept Fodder happily. As the Meadow on your Homestead is filled with fully ripened Grass that needs only the use of a Sickle to be transformed into Fodder, this item makes a perfect gift for the individuals who appreciate it.

Another item of little general value but which is appreciated by a few is a Failed Dish. Aurelia, Chester, Rudolph and Zann all will accept Failed Dishes with pleasure.

Insects, on the other hand, will be acceptable solely to Tim, who collects them and actually will pay for them. Scrap Metal can be given to Zann in a sequence of transactions that ultimately can allow you to obtain Accessories.

Preliminary Guides for Hero of Leaf Valley

As promised, I have sent two preliminary Guides for Hero of Leaf Valley to IGN. One is my Walkthrough/General Guide and the other is a mini-guide in the form of a Calendar of Festivals and Birthdays. Both are rather skeletal at this point, obviously. I have had the game only for one day, and there is a limit to the amount of work I can do in that amount of time!

Nonetheless, there should be SOME useful information in the Guide and as always, I will update my Guides daily until they are as comprehensive as possible.

I did play 'Save the Homeland' a few years ago and in some respects, 'Hero of Leaf Valley' is rather similar to that wonderful Playstation title. Without wishing to cast any shadow on the older game, I have to confess that 'Hero of Leaf Valley' far surpasses its predecessor. There are more Events and more Endings, BUT beyond that, there is the ability to marry and continue to play your EXISTING game AFTER you save the Land. In 'Save the Homeland', the game actually ENDED when you saved the land. You could carry over some of your assets to a new game, but you still had to start anew after any Ending had occurred. Moreover, although you could 'court' some of the Girls in a limited fashion, it would not lead to any life that you could experience firsthand.

In 'Hero of Leaf Valley', much like 'An Innocent Life', your successful completion of the primary quest does not bring the game to an end. You can rest on your laurels, as it were, and continue your life in Leaf Valley once the threat of destruction has been negated. You do have only two years to complete one of the Stories that will 'save the land', but if you fail for any reason, you will be able to keep some of your assets when you start again.

As some of the 'Happy Endings' are very easy to complete, there is no reason why your Character should fail in his Quest. As a matter of fact, if a player is at all uncertain of his potential at the start, he can choose one of the easier Storylines first, in order to familiarise himself with the game and to be able to devote more energy to his own private life while still moving forward towards the vital quest of saving the land.

The fundamental basis of 'Hero of Leaf Valley' is quintessentially founded on the philosophy of Harvest Moon. The last game I played was Sunshine Islands and in the dialogues both of Mark and Chelsea at different Heart Levels, it is interesting to find the underlying principles that created 'Hero of Leaf Valley'.

Mark's Dialogues in his guest room at the Inn:

At Black Heart:
My dream is to become a rancher. Living together with nature is wonderful!
At Purple Heart:
I don’t like big cities because I feel too removed from nature.
At Blue Heart:
It feels nice when the crops you care for grow really well.
At Green Heart:
I keep in touch with my family through letters. Every one seems to be doing well.
At Yellow Heart:
Mark: People need to learn how to respect nature and live with it.
At Orange Heart, a rather heartrending fact:
Mark: The hill that I played on when I was small got flattened for city development.
At Red Heart:
Mark: Freya, your Asgard Ranch is awesome! You have my respect.

As you can see, the dramatic confession at Orange Heart Level mirrors the possible destruction of Leaf Valley, an idyllic place filled with natural beauty that could be 'flattened for city development' by the Funpark Corporation.

You will find links to the two preliminary Guides on the right side of the page. They are not 'live' yet unfortunately, but I have been assured that they will be later today.

For those readers who have not seen or played 'Hero of Leaf Valley', I recommend it highly. The game is complex and rich in detail. The graphics are incredible and the music is varied and sophisticated. With 16 different storylines, you actually have 16 different games for the price of one. The fact that the PSP allows multiple save slots on a memory card makes it possible for players to begin a single game and then branch out along different paths to experience more than one ending and ultimately, more than one marriage.

Friendship always is the most important aspect of any Harvest Moon game. 'Meet and greet' every Character regularly and give them items they love as often as possible. A 'favourite' or 'preferred' gift on a Character's Birthday in 'Hero of Leaf Valley' as in most Harvest Moon and Rune Factory games is worth far more in terms of Friendship Points than it would be if given on any other day. A Calendar that includes all Birthdays therefore provides key information.

Until the links for the Guides are 'live', the following may be useful:


Calendar of Festivals and Birthdays


Spring

1 Spring: Renton’s Birthday
5 Spring: Alice’s Birthday
11 Spring: Harvest Goddess Festival
Ronald’s Birthday
16 Spring: Parsley’s Birthday
27 Spring: Lyla’s Birthday

Summer

1 Summer: Earth Day
Bob’s Birthday
8 Summer: Gwen’s Birthday
10 Summer: Joe’s Birthday
14 Summer: Rudolph’s Birthday
15 Summer: Zann’s Birthday
20 Summer: Fireworks Day
21 Summer: Wallace’s Birthday
24 Summer: Chester’s Birthday
27 Summer: Race Day

Autumn

2 Autumn: Louis’ Birthday
5 Autumn: Aurelia’s Birthday
12 Autumn: Tim’s Birthday
20 Autumn: Gina’s Birthday
25 Autumn: Race Day
29 Autumn: Katie’s Birthday

Winter

2 Winter: Woody’s Birthday
9 Winter: Dia’s Birthday
10 Winter: Kurt’s Birthday
23 Winter: Liar’s Day
Charles’ Birthday
25 Winter: Martha’s Birthday
30 Winter: New Year’s Day Festival

As usual, I will be adding other details to my Calendar Guide, including favoured gifts for each Character and any Seasonal Crops and other items.

For 'Hero of Leaf Island', I will be creating separate Guides for 'First Year Events' and 'Second Year Events', much like my Events Guides for FoMT/MFoMT and HM DS/Cute DS. THese will include all of the specific Events that must be experienced in order to obtain each of the 'Happy Endings' required to save the land.

Wednesday, April 28, 2010

Using your Hammer to Forage in Hero of Leaf Valley


In Rune Factory Frontier, one of the early delightful surprises for me was my ability to knock ripe fruit from the Trees using my Hammer. In my first day of explorinng the landscape in Leaf Valley, I discovered that my Hammer could serve the same function in this new game. Using it, I was able to collect both ripe fruits and insects from various Trees.

It is not ALL Trees that can be assaulted in this fashion but only those that display the Hammer icon.

There is a significant difference between Rune Factory Frontier and Hero of Leaf Valley in terms of the yield that is obtained when you use your Hammer to knock down fruits. In Rune Factory Frontier, the two 'Orchards' were rather magical in nature. Each Tree would CHANGE its yield according to the Season. Thus, every Tree in RFF Orchards yielded the same Fruit in a specific Season but would yield a different type of Fruit every Season.

Hero of Leaf Valley is more realistic in that the identity of the Tree determines the type of Fruit that it yields. The trees do not change their identity and thus an Apple Tree will yield Apples and an Orange Tree will drop Oranges. They are seasonal to some extent as well, so if you use your Hammer on a Tree that is not in a fruit-bearing season, you will obtain only insects.

Fruits thus are location-specific and, to some extent, season-specific and so are insects. Certain insects tend to hover in certain areas of the Map. You will need a Net if you wish to catch flying insects, but those that are earth-bound can be knocked out of Trees with the Hammer.

Tip for Players who tend to be confused by camera angles: The landscapes in Hero of Leaf Valley are breathtaking but the camera angle will shift on you quite suddenly sometimes. This is very artistic and enjoyable as an observer, but if your Character is trying to find his way about town initially, he may become hopelessly lost, entering and exiting the same building or area countless times in utter confusion.

The trick is to learn to use your Controls to change the camera angle again. You can centre the camera angle with the Triangle button or use the Directional buttons to move the camera until you find an angle that suits you.

The most foolish thing I did today in Harvest Moon was to keep my DS stylus in my hand thorugh the first few hours of playing Hero of Leaf Valley. It has become so much a habit in the past fortnight or so while I was furiously going through Sunshine Islands to bag as many events as I could that I forgot that the PSP did not have a Touchscreen.

Being an Anti-Hero (Temporarily) in Hero of Leaf Valley


********************************************************************
When you write a guide for a game, it is your duty to perform unpalatable acts, giving the 'wrong' response, the 'bad' response and otherwise exploring dark avenues instead of patting yourself on the back as you unerringly always choose the 'correct' and 'good' response that takes you forward.

'Hero of Leaf Valley' will draw you into a scenario that will be somewhat familiar both to players of 'Save the Homeland' and 'An Innocent Life'. Your Character must assume the role of saviour of the village...

At the start of 'Hero of Leaf Valley', the Harvest Goddess will quiz you to determine your aptitude to wear the mantle or cape of the Hero.

Her three questions:

A puppy is abandoned in the rain. What do you do?
Take it home.
Ignore it.


There’s trash on the ground. What do you do?
Pick it up
Leave it.

There’s money on the ground. What do you do?
Take it to the police
Keep it.

Every player will know the responses that are expected of him/her.

What happens if you give the 'bad' responses to all the questions?

For me, exploring ALL the possibilities is part of the thrill of working on a game guide.

It so happens that you can give any response you wish and you still will end up being the 'only choice' to save the land...

Thanks to a friend who is helping me to log the responses, I was able to do the negative ones without being forced to start over to log the positive responses. I had a feeling that your Character's choice of responses could affect Friendship Levels of other individuals in Leaf Valley.

As it transpires, they DO, but as in other Harvest Moon games, even 'negative' actions or responses appeal to SOME Characters. For example, littering sometimes will endear you to the Witch Princess...

Evidently, Friendship Levels are affected as follows:

If you give the 'positive' response or first response to each of the three questions
of the Harvest Goddess, you will earn +15 FP with the following individuals: the Harvest Goddess herself, Dia, Louis, Bob, Joe, Wallace, Chester and Nak.

If you give the 'negative' or second response to each of her three questions, you will gain +15 FP with Katie, Gina, Kurt, Ronald, Charlie, Renton, Rudolph and Nik.

If you give a combination of positive and negative responses, you earn +15 FP with Gwen, Lyla, Aurelia, Alice, Parsley, Tim, Woody, Martha and Flak.

None of this causes irreparable results, obviously, but if you have a specific target in mind in terms of Courtship or Friendship, you may wish to plot your responses accordingly.

I simply did not much like the responses Freyr gave in MY game and believing now that it could have an impact on the friendship levels of the people he would meet, I explored things a bit for two days and then reloaded... In any case, it is important to prove that players CAN give negative responses to all the questions and still assume the mantle of the Hero to move ahead in the game...

Even if you reject the idea of saving the land from the very start, the Harvest Sprites will forge ahead.

Flak: Yeah! Maybe you can help us save this land! Will you hear us out?

Your choice now:
Yes
No.

If you choose No:

Nac: What?! Don’t say that! We just want you to listen!

The Harvest Goddess then will make her appearance to quiz you further.

The negative responses sometimes lead to the most entertaining Dialogue, which is another reason to log them.

In this case:

Nic: W-W-What are we going to do? He’s a bad person! Terrible!

What is interesting here is that the Harvest Goddess will put a 'positive spin' on the negative as well as the positive:

H.Goddess: Calm down. He might just be the first honest person I’ve met. And I know there’s a good heart beneath that rough exterior.

Nic: Well, he can see us.

Flak: Yeah. He’s probably the only person we can ask anyway.

It takes me awhile to adjust to the controls of the PSP after using the DS exclusively for a few weeks... The PSP may be clunkier and heavier, but the graphics certainly are magical. Mind you, I love miniatures and the exquisite detail of Harvest Moon games on the GBA and DS continue to enchant me... Returning to FoMT yesterday reminded me of how marvelous THOSE graphics were even in the pre-DS era of gaming.

Later: Now that I have explored some of the requirements for the various Storyline Quests in HoLV, I can see that your Responses to the three Questions at the very start of the game can make a big difference if you wish to complete a particular Story.

Often, in order to trigger the first Event of some of the Story Quests, you need to have at least 30 FP with a specific Character. Your Responses to the three Questions, by giving you an instant boost of 15 FP with a group of Characters, make it far easier to begin certain Story Quests far more than others.

'Meeting and Greeting' a Character givea +1 FP. Giving an item he/she likes gives +1 to +3 FP, depending on the nature of the item. In some cases, the first Event in a Story Quest must be triggered before the end of the 1st Spring. With 15 FP with a pivotal Character before you even start the game, you would have a far easier task ahead of you...

A good strategy, therefore, for any player who would like to complete all the Story Quests, would be to start three different games. In each, begin with a different set of Responses and then branch off in that slot towards the Story Quests with Characters whose FP has been increased by your Responses.

Hero of Leaf Valley Guides


*************************************************************************
I received my copy of 'Hero of Leaf Valley' this morning. Many thanks to Natsume! This is simply a brief announcement to the effect that work has begun on the Guides for the PSP title and that I hope to have a preliminary General Guide/Walkthrough published by IGN by noon tomorrow. It will be rather skeletal, to say the least, but will contain basic useful information.

Meanwhile, there is a part of me that wishes I could divide myself and begin a new game of 'Sunshine Islands', return to my ongoing 'Animal Parade' game and explore 'Friends of Mineral Town' again!

As a matter of fact, I am planning to make a video about Mayor Thomas, including his Events in FoMT, HM DS and the marvelous Event with Trent in Sunshine Islands. He is a bit of a shady character, as players familiar with him in different HM games know. After all, what Mayor with ANY dignity would come to your farmhouse begging for an item every year to satisfy a gambling wager???!

Which brings me to another question:

In those games where your Character has the option to beat him over the head with a farm implement, how many players chose the option to 'continue'?

The reason I mention FoMT, actually, is because I did start a new game yesterday in order to film the introductions to Thomas, Cliff, Trent, Karen and Popuri. Within the first half hour, I was drawn into the game once more, despite the knowledge that I would not have time to pursue it, especially with 'Hero' in the wings.

What a wonderful game 'Friends of Mineral Town' is, even now! They may create new systems, but the old games have enduring appeal. I look forward to a day when those old games will be available on ALL the new systems perhaps, when one will be able to download FoMT, MFoMT, HM DS, Cute DS and so on both to the Wii and to whatever descendant of the DS allows it... or even the PSP...

Which brings me to the DS Lite. I still love that system, despite the newer versions. How marvelous to be able to have Sunshine Islands, for example, in one slot and FoMT in another and to play either at will! How clever it was of Natsume to allow FoMT/MFoMT to unlock the Mineral Town characters in HM DS/Cute DS. I loved the way one could exist in two separate towns with two separate lives and yet have a crossover, as in AWL/AnWL with FoMT/MFoMT and FoMT/MFoMT with HM DS/Cute DS. The only problem with that was the demise of the systems for the games. When the GameCube was supplanted by the Wii, the option to connect to FoMT/MFoMT disappeared. You can PLAY AWL and AnWL on the Wii but how can you unlock Van's visits to Mineral Town?

That is where I hope one day that Marvelous and Natsume will create a downloadable method to unlock extras in the old games and play them on all the new systems.

Finally, it delights me to recognise that the underlying philosophy of Harvest Moon in Thomas' Introduction in FoMT continues to define every new Harvest Moon game: 'It's your farm, and you can do whatever you like.'

Monday, April 19, 2010

New Sunshine Islands Harvest Sprites Guide

The dialogue and effects of the various Harvest Sprites and their Enchantments were threatening to take over my Sunshine Islands Characters Guide. I therefore pared down the entries for each Harvest Sprite in the Characters Guide and created a new Guide devoted exclusively to the Harvest Sprites:

Sunshine Islands Harvest Sprites Guide

The Dialogues are entertaining but the precise effects of each Enchantment may be more useful. I have logged all the effects of Small, Medium and Large Decreases in Prices and Materials at Gannon's Shop and Chen's Market as well as the effects on Mirabelle's Prices in the second half of this new Guide.

Friday, April 16, 2010

Harvest Sprite Aid with Farming and Animal Care

I have written posts previously about the best strategy to employ while you still are trying to bring all of the Members of every Sprite Team to Harvest Sprite Island in Sunshine Islands.

Once you have all 45 Sprites on the Island, your strategy can change.

All this information now is included in my General Guide but it may be useful to post it here.

In particular, it appears that when you have a full Team of Orange Sprites at 10 Hearts, you can hire a single Sprite to FEED or MOVE your Animals in and out of the Chicken Coop or Barn. One Sprite alone can fill every feeder in the largest Barn in an instant at 6.00 a.m. One Sprite similarly when hired to MOVE your Animals can bring them out of the Barn or back into the Barn in an instant!

Animal Care Enchantments and Farm Aid Enchantments are not defined by size as are those that raise Friendship or affect Prices and Materials. You simply choose the number of Sprites that you wish to hire. Furthermore, the rest period for these Enchantments is only 3 Days, irrespective of the number of Sprites hired to perform the work. In contrast, a Large Enchantment to Lower Prices requires a rest period of a full season.

What this means in practical terms is that you can hire one Sprite to feed your Animals almost every day of any season, only begin required to feed them yourself on the day after any Enchantment ends. On that day, you should return to Coral to order a new Enchantment by another Member of the same Team...

Moving an Animal outside is a potent remedy against Stress. When you are in a position to hire a single Member of the maximised Orange Team at 10 Hearts to move your Lifestock outside instantly, you should be able to reduce any Stress caused by a severe storm to zero. In fact, as the same Sprite can be ordered to return all the Livestock to the Barn instantly at the end of the day, there is no reason to leave any Animals outside after dark. This is so much easier than pushing your Animals one by one manually in and out of the Barn... I advise players generally not to bother putting any Livestock outside unless they can hire a Sprite to do the work.

Chickens, on the other hand, can be carried easily outside by your Character and deposited in a small pen made from Material Stone or any other building material. When Poultry or Livestock are outside during daylight hours in fine weather, their Affection increases as well.

Wednesday, April 14, 2010

Official Natsume Forum is LIVE

Natsume's Official Harvest Moon forum now is live, which means that players can go directly to the source with all of their questions about Harvest Moon and Rune Factory games. I am a moderator on the forum. Please do register there!

Official Natsume Forum Registration

New Features on Harvest Moon Forever

After some thought, I have added a few new features to my Sites, including direct links to Harvest Moon and Rune Factory games sold by Amazon as well as a detailed 'Search' engine for this site at the bottom of this page. Another 'widget' of Amazon links is included at the bottom of the page as well, leading to some of my favourite literary Classics. (I will add to this one. At the moment, it contains only links to books by E. Nesbit.) The link to Harvest Moon and Rune Factory games includes the upcoming 'Hero of Leaf Valley'.

Unfortunately, where older Harvest Moon games are concerned, the prices on Amazon sometimes are higher than the original retail prices. I do not condone this particularly, but at least it does provide players who do not own the games with a chance to acquire them if they are willing to pay the price.

There should be 'buyer protection' for any products bought from Amazon sellers.

Tuesday, April 13, 2010

Postscript to the Pumpkin Festival in Sunshine Islands


**************************************************************************
In writing my guides for any Harvest Moon game, I usually try all possible responses in any given situation. When visitors knock on the door on the day of the Pumpkin Festival, therefore, I note the responses they make when you refuse to give them sweeties or give them odd inappropriate items instead but then reload to give them Chocolate or another Sweet that they will find acceptable.

In Sunshine Islands, I wanted to test the response for actual 'Candy' in the form of Rice Candy or other sweets made from Rice Candy as well as the responses to various 'Desserts' such as Pudding and Pineapple Pie. I therefore made a few items, intending to give them to each consecutive visitor without reloading until the very last visit from Felicia and the party on Meadow Island.

If I had reloaded immediately after each visit as I had done in previous years, I never would have discovered an important aspect of the Festival which is that, should you NOT give Chocolate or any acceptable Sweet to a visitor, that visitor will be your LAST until the next year.

Charlie is the first visitor. When I gave him Boiled Spinach and then re-entered the House expecting to receive Eliza next, she failed to appear. When I gave Charlie a Chocolate Banana and Eliza a Pudding but then attempted to give Popuri Omelet Rice (her Most Favourite Gift on an ordinary day), the Witchkin never appeared, nor did Felicia after that...

What this means essentially is that you have to give ALL your Visitors a Sweet if you wish to receive Felicia's invitation to the Party at Meadow Island. I did test many different 'Desserts' and ALL were acceptable to the Pumpkin Festival visitors. I therefore would venture to guess that ANY Dish that is listed in the 'Desserts' section of your Cookbook will qualify.

I have revised my guides accordingly. Previously, the Calendar's entry simply listed the different visitors and explained Felicia's Party on Meadow Island, without carrying any warning to the effect that, should you deny any visitor a Sweet, you will have no opportunity to attend the Party.

I made a video for YouTube a few months ago about the Pumpkin Festival that shows the visits and the party on Meadow Island. It is very touching to see that Karen, an individual who really detests sweets of all kinds, attends the Party for the sake of her best friend Popuri and will thank you as well for giving 'candy' to Popuri. The Party on Meadow Island, incidentally, does not end until 6.00 p.m. so if you do not wish to waste any working hours during the day, count your visitors and make certain that you do not re-enter your House after the Witchkin's Visit until you are ready to go to the Party.

Another new discovery I made was the ability to cook DURING a Pumpkin Festival visit. You actually can whip up some 'candy' while your Visitor waits patiently inside your Farmhouse! No earth-shattering new information but it IS interesting!

Tribute to Yasuhiro Wada


Any one who has played Island of Happiness and/or Sunshine Islands is familiar with the rather laconic character, Wada. Wada is the only true 'native' of Sunny Island and is the repository of its ancient mysteries and traditions. Befriending Wada can lead to situations where the entire bounty of Sunny Island becomes available to your character. It is fitting that Wada bears the name of Harvest Moon's founder, Yasuhiro Wada.

Recently, Yasuhiro Wada announced that, for 'personal reasons', he no longer would be as active in directing operations at Marvelous. He will continue to act as an advisor, however.

The character of Wada is NOT that of a farmer, but he rather is part of a hunter and gatherer culture. Yasuhiro Wada confesses that he tried farming but has no expertise in farming in the real world. 'I tried it,' he told an interviewer a few years ago. 'It was hard work.'

Farming is hard work in Harvest Moon as well, lending versimilitude to the games. Under Wada's guidance and with the help of Natsume in North America, Harvest Moon has become an internationally-beloved alternative world.

Here are some photographs of the 'real' Wada and his namesake in Island of Happiness and Sunshine Islands. Many, many thanks to the creator of Harvest Moon for making it possible for us to enjoy over 10 years of a magical universe where hard work and loyalty to friends are rewarded and where we can interact with the seasons and the Earth to create a life in harmony with Nature. May the magic continue in the hands of those who have inherited the mantle of leadership from him...

I do have one question to ask of Wada, however. What is the REAL connnection between Wada and the mysterious 'Tower' behind his Hut in the Jungle? Will that 'ship' one day take off again to colonise new planets?

P.S. Pursuant to questions from readers, I need to make it very clear that neither the quality nor the quantity of Harvest Moon games will suffer from the real Wada's decision. His successor, Haruki Nakayama, actually is included in the credits for Harvest Moon games as far back as 2004 in 'A Wonderful Life' (and possibly other early games) and has been responsible for Island of Happiness, Sunshine Islands and Animal Parade, inter alia. The only reason I wrote about Wada's announcement is because he was very much part of the founding of the series and has been immortalised in the character of Wada in IoH and SI.

In fact, as CEO of Marvelous Entertainment, Haruki Nakayama made a statement recently about the Nintendo 3DS announcement. He believes that the device will succeed commercially when it launches, even though the system's retail price and development costs associated with it will be higher than previous systems. As he appears eager and excited as well as optimistic about its online capabilities, it hints at possible future Harvest Moon and Rune Factory titles for the system...

Looking forward to Hero of Leaf Valley

I should be receiving a copy of the soon-to-be-released Harvest Moon game, 'Hero of Leaf Valley' for the PSP in a few days... I will begin to work on Guides for the game as soon as I receive it. As always, I am very excited about ANY new Harvest Moon game while still feeling there still is a great deal to explore in all the existing games...

Incidentally, 'Hero of Leaf Valley' will be the third Harvest Moon game produced by Natsume for the PSP. The first was 'Innocent Life' and the second was 'Harvest Moon Boy & Girl'. In fact, as 'Harvest Moon Boy & Girl' really is two games in one, 'Hero of Leaf Valley' actually could be considered the fourth game produced for the PSP platform.

Sunday, April 11, 2010

Winning Animal Contests in Harvest Moon and Rune Factory

I receive rather frequent emails from players even now asking how they can win the Animal Contests in HM DS or Cute DS as well as the question of how Large Eggs are produced.

Winning an Animal Contest in any Harvest Moon game is based on Heart Levels. Producing superior Ranch Products in Harvest Moon games usually is based on Heart Levels as well. Where there are options to play Touchscreen mini-games, you may be able to boost the quality or size of the product by obtaining a very high score in the game.

The key to success both in Harvest Moon and in Rune Factory where any kind of breeding option exists is to raise the quality of your Ranch Animals through breeding. This strategy becomes critical where Animals, especially poultry have defined life expectancy.

In many games, you can obtain the highest quality of product without ever winning an Animal Contest, as long as the Animal attains maximum Heart Level. In other games, such as Friends of Mineral Town/More Friends of Mineral Town, the very highest quality of Product in the form of Gold Product or X Product cannot be obtained unless the Animal in question has won a Contest. (In FoMT and MFoMT, a certain number of hours spent outside is required as well to obtain some special products. You had 1 chance in 255 of obtaining an X Product from any Animal who ordinarily yielded Golden Product.)

In Sunshine Islands, the highest Rank of Product, which is S Rank, cannot be obtained ordinarily unless the Animal has won 1st Prize at a Festival. The exception to this is the Milking/Shearing Touchscreen Game, where even an Animal who would not yield S Rank product otherwise can do so if you obtain a high score.

As there is no egg-producing Touchscreen game in Sunshine Islands, the sole method of obtaining S Rank Eggs is by winning 1st Prize at the Chicken Festival.

No matter how religiously you play the petting game in HM DS/Cute DS, you may find that your Chickens die before you ever win the Chicken Festival or obtain a Large Egg.

The rather short life expectancy of Poultry makes an aggressive breeding strategy more important than it might be with respect to Livestock. If, however, you wish to obtain the best grade of product as early as possible in almost any Harvest Moon game and in Rune Factory games where breeding is an option, you need to breed your Animals.

The general rule in Harvest Moon is that no Animal born on your Farm/Ranch will have a Heart Level lower than 2 Hearts at the time of his/her birth. Any Animal purchased from a local merchant, on the other hand, always will have a Heart Level of zero.

In Sunshine Islands as in many other games, the Heart Level of the Animal who is born on your Ranch will equal half of the heart level of the parent. The rule that no Animal will be born with less than 2 Hearts makes it possible to begin to breed your purchased Animals even before they have gained any Hearts themselves and still obtain better Animals through breeding. Breeding livestock usually is a much slower process than incubating Eggs. The fact that there usually are Ranch Tools, such as Brushes and/or Petting Gloves that can raise any Livestock Animals heart levels means that there is less need to begin breeding Livestock before they have attained fairly high heart levels. A longer life expectancy for Livestock as well as the fact that no Ranch products are produced by Livestock during the course of pregnancy are factors as well in determining when to breed a Cow or Sheep. (In Rune Factory Frontier, any Monster who 'trusts' you, can produce an Egg instantly so there is no need to delay breeding. 'Trust' is translated to 2 Hearts I believe.)

As soon as you can afford to buy an Incubator in any Harvest Moon game, you probably should invest in one. In FoMT and MFoMT, players often made a fairly decent little early income by incubating eggs and selling the Chickens they raised to Popuri. I always was too sentimental to pursue that strategy...

In HM DS/Cute DS, possibly the ONLY way to obtain Large Eggs is by incubating Eggs progressively to raise Chickens of a high enough Heart Level to win the Chicken Contest before they die of old age.

I have covered the topic of choice of Entries in the various Animal Contests in Sunshine Islands in my General Guide as well as strategies for maximising your profits in terms of Ranch Products. In Sunshine Islands (as well as IoH), you can enter the same Animal each year to win progressively superior 'Crowns' and Titles. THE ONLY VALUE OF DOING SO IS THE PRICE THAT MIRABELLE WILL PAY FOR THE ANIMAL. As the actual value of the Ranch Product produced by a different Animal who won the basic Copper Crown would exceed the profit made by selling a Cow/Sheep with anything higher than a Copper Crown very quickly, the best strategy in financial terms is to enter a different Animal every year and win the Copper Crown that will allow the Animal to produce S Product regularly.

Where Pets are concerned, you never have a choice of entries but with Poultry and Livestock, it is best to enter a different Animal each year. Incidentally, Heart Level is all that matters where the chance of winning 1st Prize is concerned. A Silkie Hen at 10 Hearts has no better chance of taking home a Copper Crown than a regular Chicken. The difference between the two is in the value of the product produced and it is Jersey Milk and Suffolk Wool, when converted into Superb Cheese and Superb Yarn that yield the largest profits. Superb Mayonnaise is more valuable than regular Mayonnaise, but shipping it will not make you rich.

As previously indicated, it is possible to obtain S Milk and S Wool in the course of the Touchscreen Milking/Shearing games even when the Animal in question has not won First Place at a Contest. You therefore can unlock the Jersey Cow and Suffolk Sheep simply by shipping 1 S Milk and 1 S Wool obtained in these mini-games before you would be able to enter a Cow/Sheep with 10 Hearts in the appropriate Contest.

You can obtain a Silkie Egg from Mirabelle as a birthday gift in the second year if she is at 7 Hearts or higher. You then can incubate it and hatch a Silkie Chick. The ordinary method of unlocking the Silkie Hen is by shipping 1 S Rank Egg.

The only ways of raising a Chicken's Heart Level are:

1. Feed it daily;
2. Hold/Hug it daily;
3. Take it outside in fine weather and do not allow it to be threatened by the Wild Dog;
4. Play the Petting Touchscreen game when it occurs.
5. Enter the Animal in the appropriate Contest and ATTEND the Festival.

Here are the values for each action:
Eats Meal: +1 Friendship, 0 Stress
Hold or Pet/Speak to Animal: +1 Friendship, 0 Stress
Touchscreen Petting Game: +0 to +20 Friendship, -0 to -20 Stress*
*The actual value depends on your success in the Petting game. There are three separate stages for success. In the first, the animal shuts its eyes. In the second, he/she blushes. In the third and final stage, the animal’s eyes are tightly shut, indicating a state of utter bliss. When the game is completed, the animal should be surrounded completely by hearts for maximum success.
Use Brush: +3 Friendship, -5 Stress
Use Milker: +1 Friendship, 0 Stress
Use Shears/Clippers: +1 Friendship, 0 Stress
Enter Animal in Festival contest: +30 Friendship, 0 Stress
Outside on Sunny/Hot Day: +0.2 Friendship per hour, -2 Stress per hour
Outside on Cloudy Day: +0.1 Friendship per hour, -1 Stress per hour
Unable to Eat: -5 Friendship, +20 Stress
Do not Hold or Pet/Speak to Animal for 2 Days: -2 Friendship per day, +2 Stress per day
Strike with Farm Tool: -10 Friendship, +10 Stress
In presence of Wild Dog: -2 Friendship, +10 Stress
Neglect to attend Festival when Animal is an Entry: -20 Friendship, +50 Stress
Outside in bad weather, in Drizzle, Rain or Snow: -2 Friendship after 4 Hours, -1 Friendship for each additional hour, +1 Stress per hour
Outside in Typhoon or Blizzard: -10 Friendship, +30 Stress

The natural life expectancy for a Chicken or Silkie Chicken is 4 years. A Cow and Jersey Cow each have a life expectancy of 6 years and a Sheep and Suffolk Sheep have a life expectancy of 5 years.

As you can see, the speed at which you can raise a Chicken's Heart Level will depend somewhat on chance in terms of the weather and the occurrence of the Petting Game.

How long does it take to raise a Chicken to 10 Hearts? Here are some examples from Freya's Ranch that demonstrate the significant difference between a Chicken hatched on your Ranch and one purchased from Mirabelle:

Glimr, purchased from Mirabelle at 0 Hearts on 6 Winter of the previous year and taken outside only sporadically, had attained only 4 Hearts almost a year later at the end of Autumn.

Adoro, hatched from a Chicken who had 10 Hearts but had never won the Chicken Festival*, born on 15 Winter and taken outside every day in fine weather, had attained 9 Hearts at the end of Autumn.
*The Egg of such a Chicken would be Rank A, Quality 10, Size 5, Freshness 10. This would be the Rank and Quality of Milk and Wool produced by Cows and Sheep at 10 Hearts if they never had won 1st Prize at a Festival.

Aliya, hatched from an S Rank Egg (from a Chicken who had won a Copper Crown), born on 18 Summer and taken outside every day in fine weather, had attained 7 Hearts by the end of Autumn of the same year.

Examples of Silkie Hens at low Heart Level are:

Onyx, purchased from Mirabelle at 0 Hearts on 9 Summer, on the last day of Autumn of the same year finally had attained 3 Hearts.

Kalila, hatched from Onyx's Egg and thus born with the minimum 2 Hearts on 3 Fall, had attained 3 Hearts by the end of the same Autumn.

As you can see, the advantages of incubating an Egg even from a Chicken with low Heart Level, are significant.


The prices that Mirabelle would pay for Animals depend not only on Heart Level and any Crowns they have won but also the length of time that you have kept the Animal and whether or not the Animal was born on your own Ranch.

Here are some examples:

For a Chicken with a Bronze Crown, Sparkl: 7000G
For a Chicken with 10 Hearts and no Crown, born 2 years, 1 month ago : 5360G
For a Chicken with 10 Hearts and no Crown, born 2 years ago: 5235G
For a Chicken with 9 Hearts and no Crown born almost 2 years ago: 4640G
For Glimr, the Chicken with 4 Hearts, born almost 1 year ago: 2105G
For a Chicken with 10 Hearts but no Crown, born a little less than a year ago FROM AN INCUBATED EGG: 5240G
For Aliya, the Chicken with 7 Hearts, incubated from an S Rank Egg, only 1 Season previously: 3900G
For Onyx, the Silkie Hen now at 3 Hearts purchased from Mirabelle a season and a half ago: 2005G
For Kalila, the Silkie Hen now at 3 Hearts, incubated from Onyx's Egg less than a season ago: 2285G

If Freya had sold some of these Chickens to Mirabelle one season prior to this:

Sparkl: 7000G
Glimr: 3 Hearts: 1650G
Adoro, 8 Hearts: 4250G
Silkie Onyx at 1 Heart: 1350G
Silkie Darks at 1 Heart: 1380G

The real moral of this tale is that it is a good idea to order an Incubator from Gannon at the earliest opportunity and begin to incubate the Eggs that your first Chicken hatches and continue to incubate the Egg from each succeeding generation to raise Heart Levels at birth progressively.